Zoom’s Sign Language Interpretation Feature allows sign language interpreters to have their own video channel. Participants can select to view the sign language interpretation and resize or relocate the video channel to their preference.
How to Enable Sign Language Interpretation View
- Login to the Zoom website.
- In the navigation menu, select Settings.
- Select the Meeting tab.
- Under In Meeting (Advanced), select the Sign Language Interpretation View and toggle to enable it. If this option is grayed out, you need to contact your Zoom admin and request access to this feature.
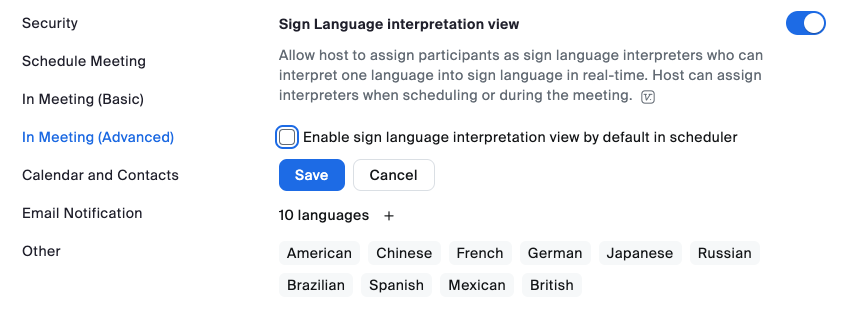
- If a verification dialog appears, click Enable.
- If you wish to enable this feature as a default setting, select the Enable sign language interpretation view by default in scheduler check box and then click Save.

How to Assign an Interpreter
- Go to the meeting controls toolbar and open the Interpretation menu.
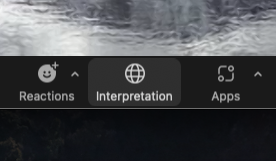
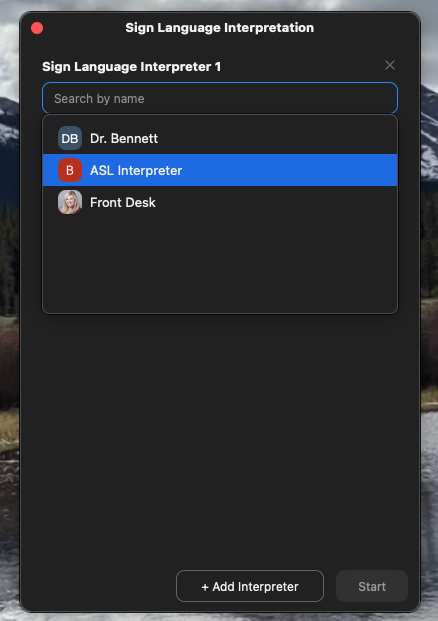
- Then select + Add Interpreter and select the interpreter from the participant’s list dropdown.
- Select American Sign Language from the dropdown menu.
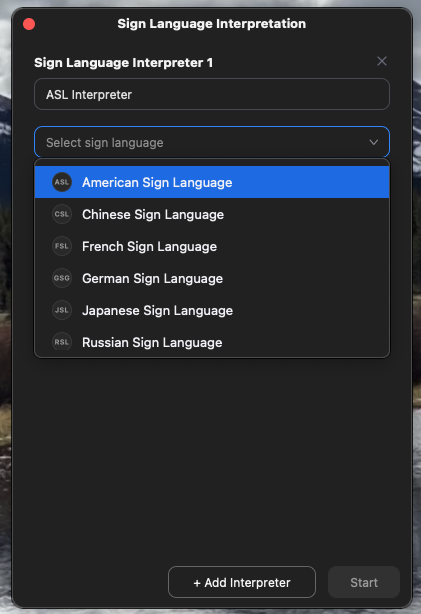
- Then click Start.
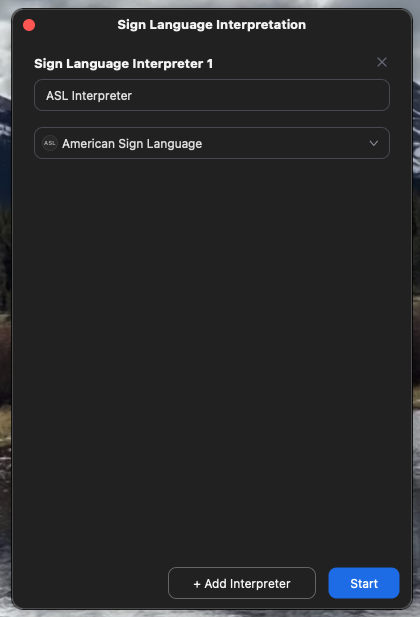
How to Start the Sign Language Interpretation Feature
- When the meeting or webinar starts, the host must start the interpretation feature. In the meeting controls toolbar, click the Interpretation icon. On smaller screen sizes or windows, you may have to click the More icon, then select Interpretation.
- An interpretation menu will open. Here you can do the following:
- View assigned interpreters.
- Add or remove interpreters.
- Start or end the interpretation feature for all participants.
- To start the interpretation feature, select Start. This will move the interpreter from the gallery to the designated pop-up window. Everyone in the meeting will be notified that sign language interpretation is available. The sign language interpreter will be shown in a designated video channel for sign language interpreting. Participants can choose to view this language channel if they wish.
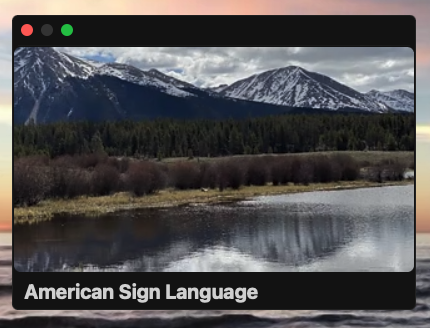
Please note, If the interpreter’s video is off, or the interpreter has not joined yet, a message will appear to the participants that have the sign language feature turned on that says, “Waiting for interpreters to join or turn on video”.
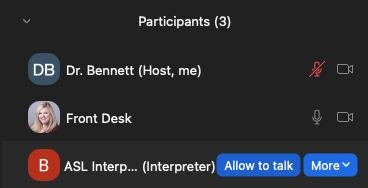
By default, when interpretation is started by the host, sign language interpreters will not be allowed to unmute their microphones unless given permission from the host. The sign language interpreter will need access to their microphone to voice for the Deaf individual(s). We recommend granting access before the meeting. Your interpreter will know to keep their microphone muted when not in use.
How to Mute or Unmute an Interpreter
- In the meeting controls toolbar, click on Participants.
- Find the interpreter’s name, hover over it, and select Allow to Talk. The interpreter will now have access to their microphone to voice for a Deaf or hard-of-hearing participant if needed.
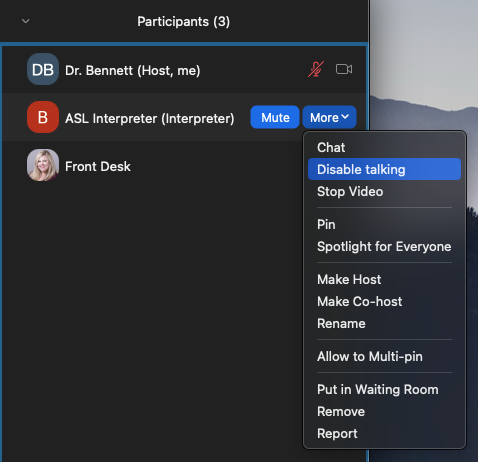
- If for any reason you need to mute the interpreter again, right-click their name in the Participants panel, then click Disable Talking. Their video will no longer be present in the main session and their microphone will be muted.
How to Remove an Interpreter
- Go to the Interpretation menu and select Manage Language Interpretation…
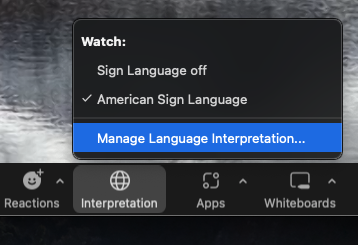
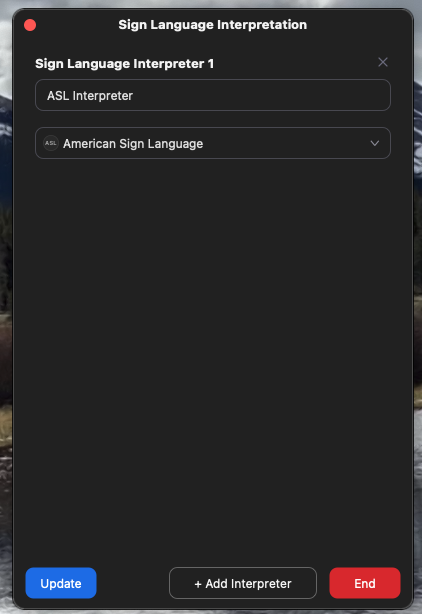
- Find the interpreter’s name that you wish to remove and click the delete icon X next to their name. Then select Update. The interpreter will be removed from the designated interpreting video channel.
How to End the Interpretation Feature
- Return to the Interpretation menu and select End.
- Everyone is then notified that the host has ended the interpretation. For anyone designated as a sign language interpreter, their microphone is enabled but muted by default. Their video reappears in the meeting or webinar gallery. If the meeting is finished, let the interpreter know they are free to go.
